8.16.2008

Pleasure machine

Last summer I spent a lot of my time designing and assembling one sexy hunk of wood. I had two guitars before starting this project: an Epi Les Paul and a Squier fat Strat. As any guitarist knows, these are the low-end versions of the most iconic electric guitars ever built. Having played these, and a variety of other guitars, I embarked on a journey to design a guitar that was both aesthetically and functionally beautiful. Of all the guitars I had played I still loved the feel of my good ol' Chinese strat. The pups were noisey and harsh, tuning machines were cheap and didn't stay in tune, and the countless layers of black paint and poly-U were chipped and cracked. I thought I'd use the body of this beast for familiarity's sake and for sentimental reasons. This post is a rewritten account of what was presented in this forum. Enjoy!


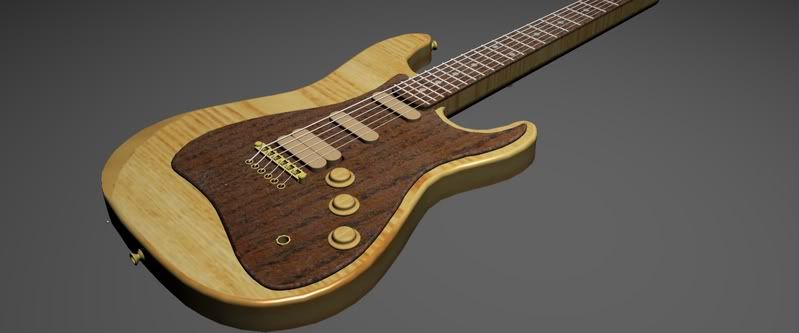
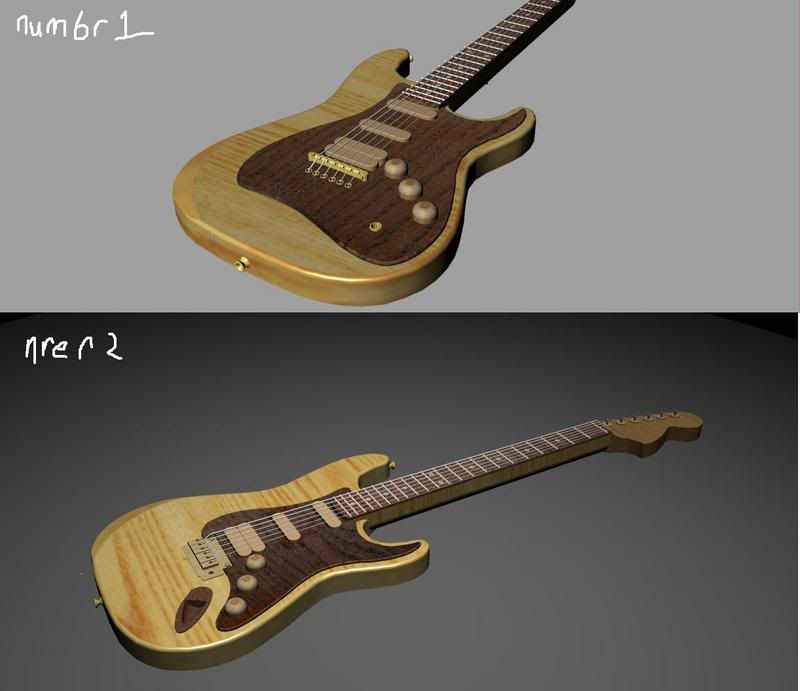
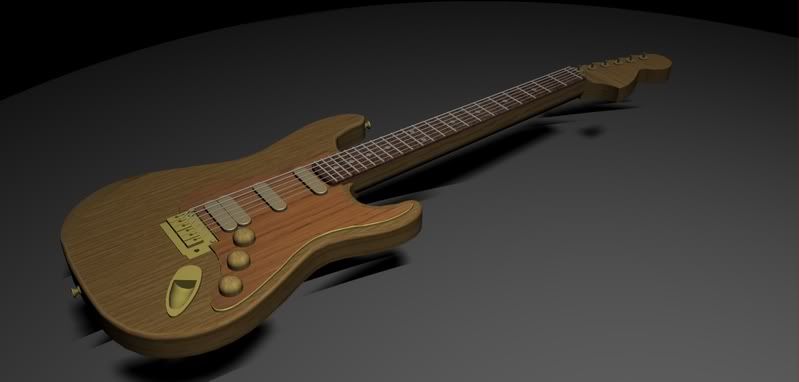
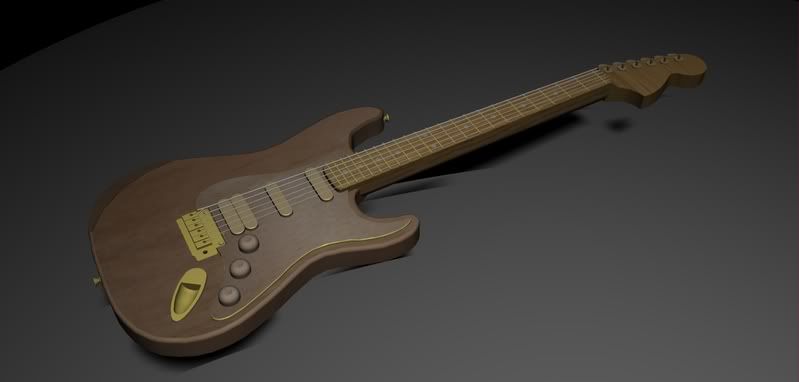
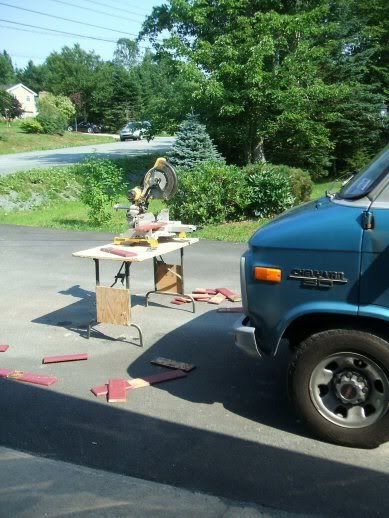
I've been playing for about four years now and I decided a while back to sell one of my guitars and an amp to rebuild my squier strat (first guitar). So, armed with $350 and a computer, I threw together a couple of models and made a few investments (soldering iron, wire, wood, all that jazz).
The first few pics show it with a rosewood pickguard. I later found out after visiting a hardwood specialty shop that I would have to sell my soul to pay for a good chunk of Indian rosewood, so on my way home I picked up a 2'x4' oak veneer at kent for $3. The knobs are going to be boxwood dome knobs, and all the hardware is going to be gold. although, I'm going to try to carve a jackplate out of a piece of oak...Which probably wont work. but it would certainly look neat . Pups will be cream hot gold lace sensors, and the controls will function as follows: master volume, master tone/passive overdrive push/pull pot, and a blender pot. all 500k pots, standard 5-way switching, and a 0.022uF tone cap + volume kit.

Photobucket

Photobucket

Photobucket

Photobucket

Photobucket

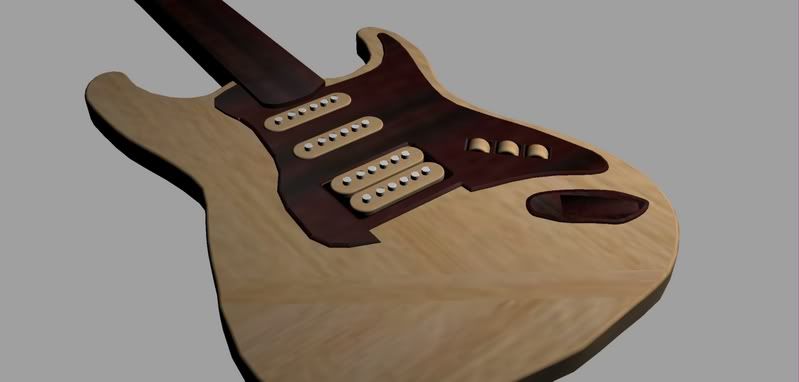
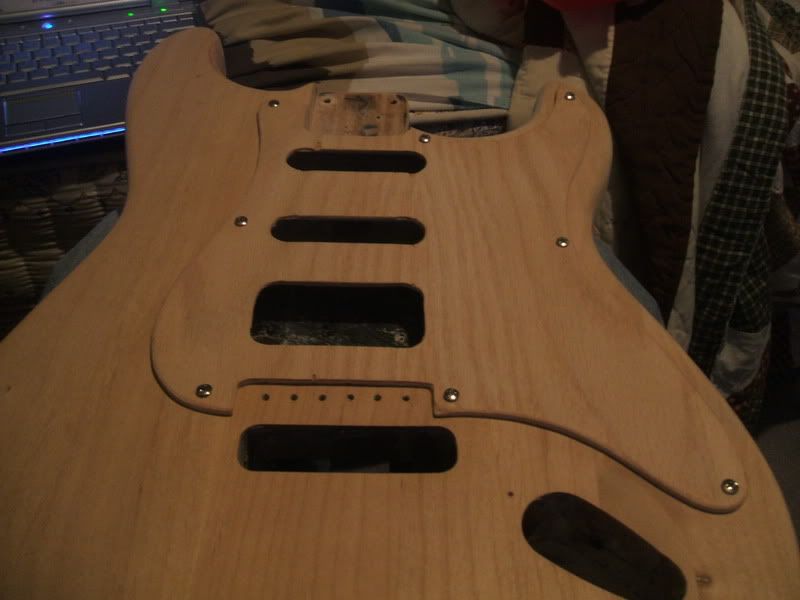
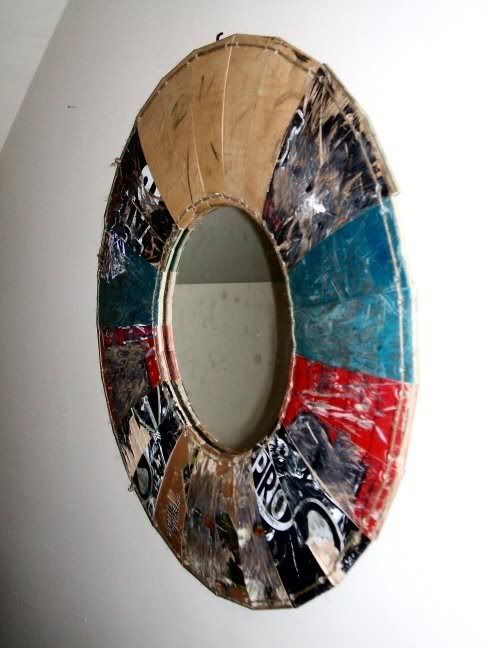
This is my first attempt at making a pick guard. it went okay. That wood chips like something horrible though. I've made three since then, and several neck plates and trem covers

Photobucket

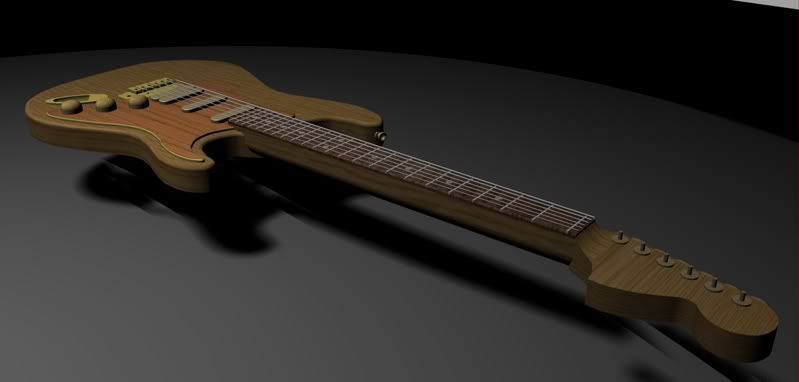
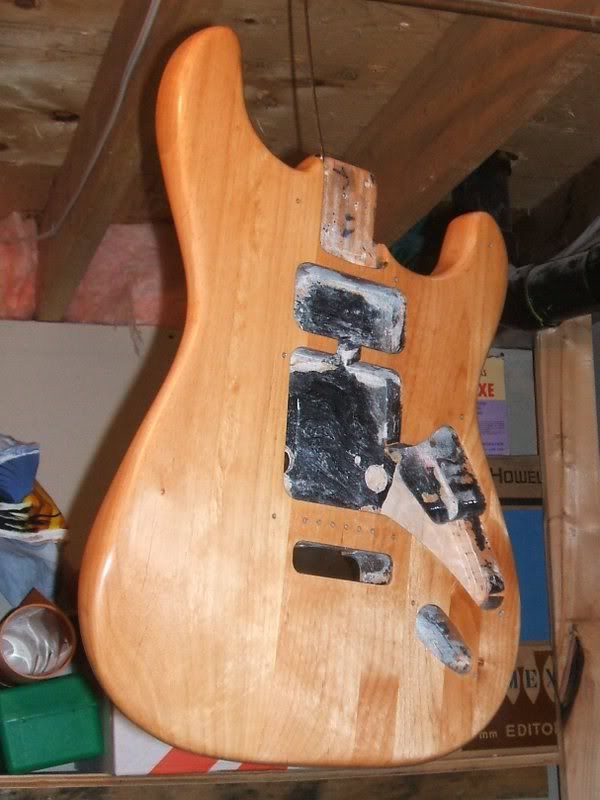
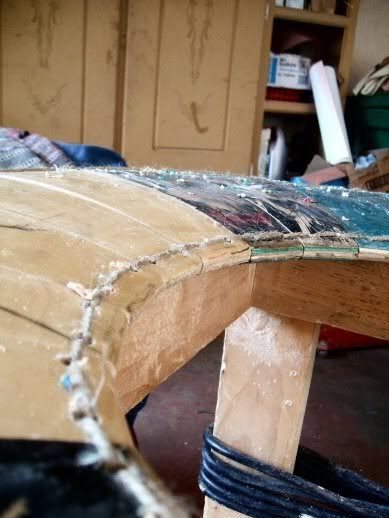
Back side with neck plate and incomplete trem cover. I think I'm going to put some gold string ferrules in there.


Photobucket

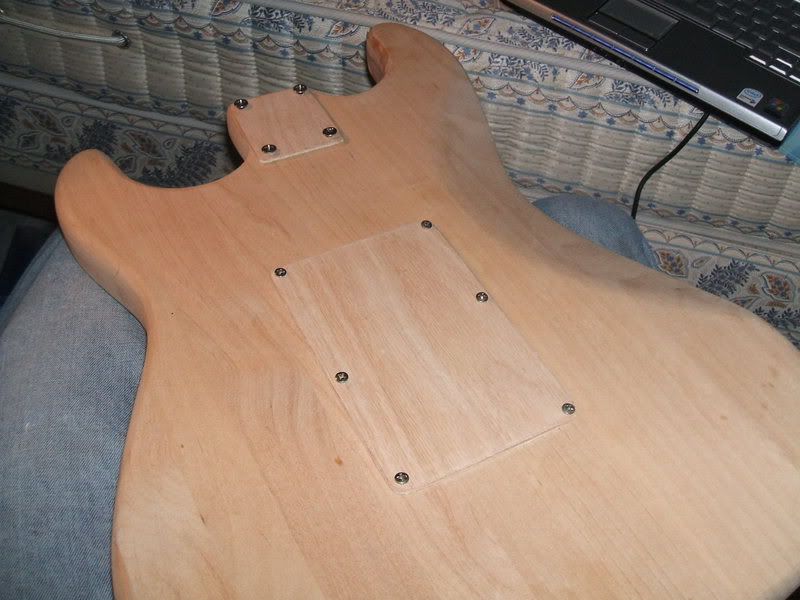
That's all so far. Still have to buy lots of parts. I doubt the neck plate will work at all if I leave it like that. What I'd really like to do is take the veneer off the plywood, glue it to the neckplate, then put the Fender "F" on there with gold leaf.

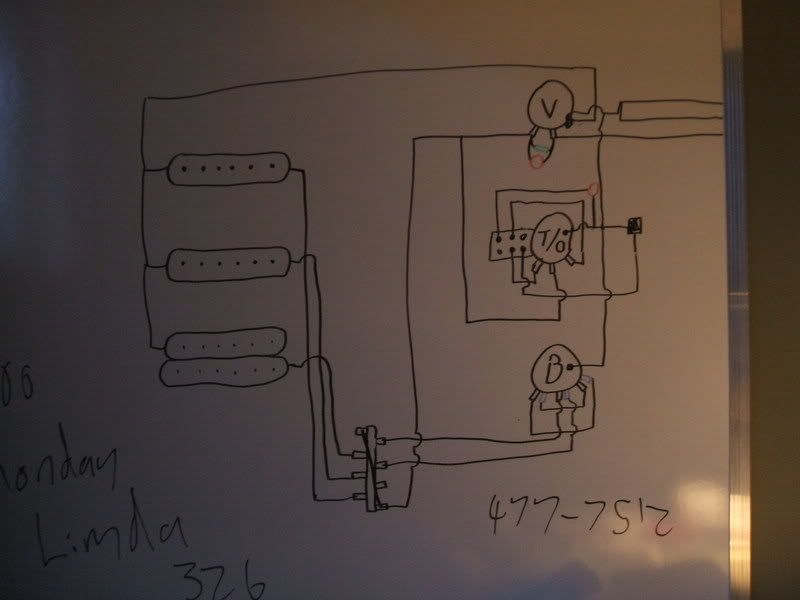
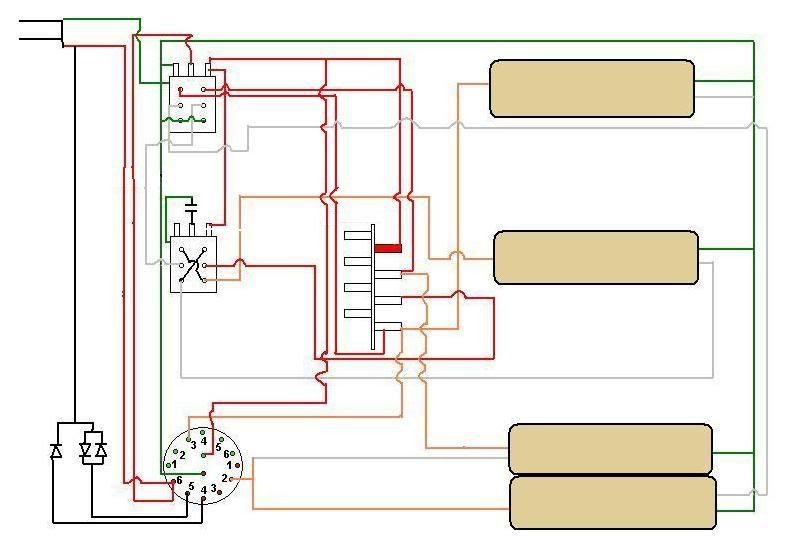
This is a schematic of the wiring I did a while ago. Pretty sure the wiring for the switch is wrong, don't remember, but it gets the point across. I took a picture of my white board, so it's not too clear. The Blender pot has six leads, black is top, blue is bottom. red things are caps, green thing is a resistor, and the black box is the overdrive thing.

Photobucket

The program I used is called Rhino3D (http://www.rhino3d.com/). Any 3D modeling app is a great start to any design project. if you're not sure how your car will look with that new spoiler and hot pink paintjob, you can always model it first

Photobucket

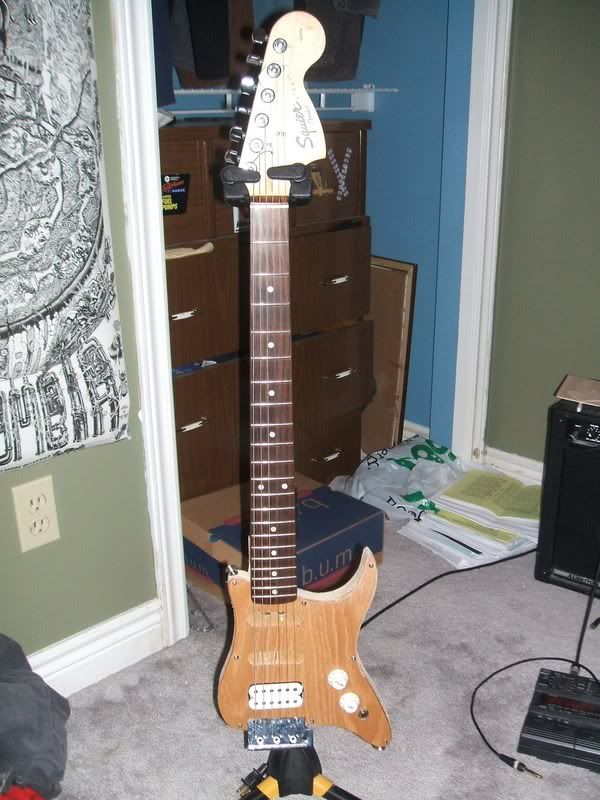
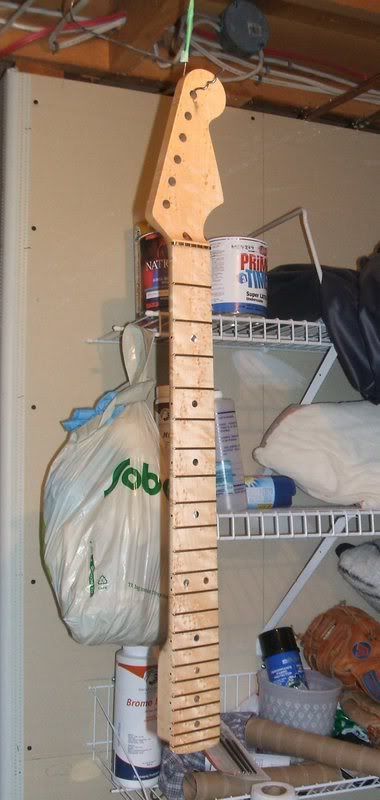
I just got my neck and pickups from Warmoth. Still have to wait a while for the hardware (gold vintage tuners, bridge, screws, maple bell knobs), but I thought I'd put this up here. I've decided to finish it with tru-oil to keep it as raw feeling as possible, but protected.

Photobucket

Those gold frets are mighty high and narrow (0.090"x0.055"). A LOT taller than the frets on the squier neck. It'll take some getting used to, but I'm pretty excited to try it out. While this guitar was in pieces I attached a piece of plywood to one of the pick guards that didn't turn out so well and stuck a humbucker in there. Played pretty good for an electric pickguard!

Photobucket

I've changed my mind about the wiring. I am going to use the passive overdrive, but it'll be a little different. One push/pull pot will turn it on, and another will switch between symetrical and asymetrical clipping. It's a mod of this, which is a mod of the black ice overdrive. and I'm thinking of making a varitone instead of using a blend pot. Anyone ever make one of these/find them useful?


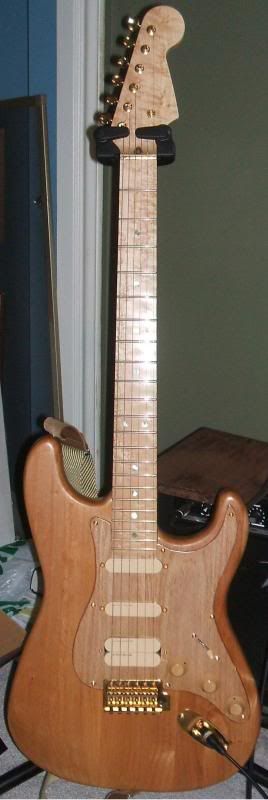
Okay, finishing is done. Couldn't find any tru-oil, so I went with Minwax tung oil finish. It's oil, varnish and mineral spirits, the closest thing I could find to tru-oil. I ended up guilding my nut because the white stuck out a lot. I just threw it together for a test fit, and to see how everything looks. still need to drill the tuner holes a little bigger, so they're not in there yet.
I had to rout the cavities a little deeper because I dreamed up this complicated wiring with two push/pull pots and a six way rotary switch.

Pushpot 1:normal (parralel wiring)/series wiring (all three in series, neck and bridge in series)
Pushpot 2: middle pup out of phase

Rotary switch:
1-nothing
2-neck in
3-coil shunt
4-asymetrical clipping
5-symmetrical clipping
6-Kill switch, maybe?

This should give me a total of something like 39 different sounds, all within what looks like a normal strat.

Photobucket

Photobucket

Photobucket

Photobucket

Photobucket


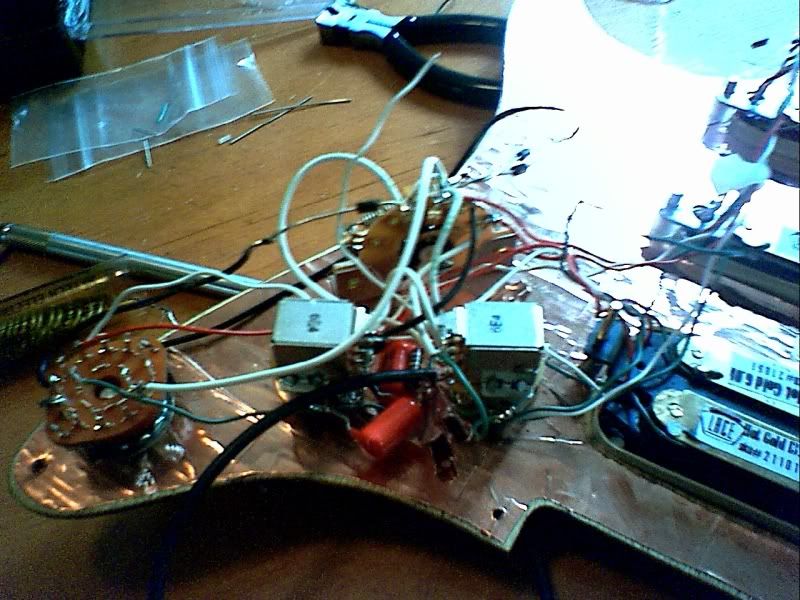
The wiring worked the first time, no problem, which made me very happy because it was hell to wire. The two p/p pots were facing each other and I had to fit wires, two orange drop caps, and a resistor onto 18 lugs within a little more than an inch (tweezers came in handy).

Photobucket

Photobucket

I'm taking it into music stop tomorrow so that they can adjust the intonation and action, because I have no clue what the hell I'm doing with truss rod and saddle adjustment. Other that that, She's done.

NOTE: Adjusting the truss rod and saddles is not that difficult or dangerous. after I got it back from musicstop I found that not only was it not done properly, but I was out $60. Just take your time with it and you'll be okay.

Photobucket

WARMOTH
neck - $208 pups - $150 (on clearance)
GUITAR PARTS RESOURCE - bridge, tuners, picks, misc parts - $281
STEWMAC - electrical components, hardware (screws, jackplate, etc) - ~$200

All and all...too much. There's stuff I got along the way like a soldering iron, poly-U, tung oil, gold leaf, other tools and stuff, but it's stuff I'll use in the future, so it's all gravy. Probably around $1000 in the end. Which isn't bad, it was my entertainment for three months. Plus I got to learn everything there is to know about passive guitar electronics. If I ever run into some cash I'd like to go for a second build.

7.29.2008

One man's trash

One of the great things about being a student living on your own is the inherent creativity involved in making your house feel like home. We don't have money for those fancy "bed frames" made of "real wood". Since the dawn of student dept students have been propping their beds up on milk crates, using industrial cable spools as kitchen tables, hell, when I moved into my house the walls were adorned with construction signs.

This weekend I made two pieces of decor that only cost me a roll of heavy duty twine, and here's how!

When I left Good ol' O'Brien hall in April I found six skateboard decks in the garbage. They weren't broken, but heavily used. I figured there's got to be something that you can make with skateboards, so they sat in my father's basement for several months...

The other day when I was coming home (on garbage day) I found a mirror on the side of the road. After that I did what anybody with six skateboards and a mirror would do: Said, "Shit, son, I've got too much garbage in my house." Then Put them in my closet for later use.

I tried to put up my mirror, but not only did it look ridiculous, it didn't have any way to fasten to the wall. I needed a frame so that I could hang it somewh- A FRAME I'LL MAKE A FRAME! But not just any frame, a ROUND frame made of SKATEBOARDS.

Step 1: Design
The first problem was how to make the largest ring possible with the materials that I had. An optimization problem, essentially. To solve it I made a set of formulas that would calculate the length of each side of the trapezoids that make up the ring relative to the number of pieces being used and the radius of the ring. If trigonometry isn't your bag, you can download a spreadsheet here to work it out.

Photobucket

For those that want to know, the equations used are below

a=sin(Θ/2)*2r
x=tan(Θ/2)*8
b=a-2x

Where Θ is 360/number of pieces

I had to play around with the numbers a bit to find a size that didn't require me to cut at an angle of 13.15982 or something equally impossible. You have to keep in mind that you can only cut about 12 inches of the middle of the skateboard (within the wheelbase), after that the contour changes and pieces wont fit together uniformly when you put them together. You'll also run into the holes for the trucks.

Step 2: Cut!
Pretty simple. Just make your cuts. if you don't have an electric mitre saw you can use a mitre box and hand saw. Or if you have a lot of patience, draw a line and cut with a hand saw. Or, if you're Chuck Norris, use precision round house kicks.
On the topic of precision, mitre saws are not. If I had to guess they're probably accurate to within +- 1 or 2 degrees. If you're cutting a lot of pieces at small angles (like I was) your wedges are not going to be identical. This means that at the end you will have to compensate, probably by adding an extra piece, which is what I did. If you have some extra wood you could make practice cuts and find where on the saw the right angle is.

Photobucket

Step 3: Glue
Glue that shit together.

Step 4: Drill
Once the glue has dried you should be able to handle it. WITH CARE. Wood glue is strong, but it is by no means ready for a game of skateboard ring Frisbee. Put it on top of some scrap wood or on a floor that is impermeable to drills...Drill four holes in each piece. One at each corner. You could measure these, but I didn't want to mark 100 holes so I just eyeballed it.

Step 5: Sew
This isn't your grandmother's sewing with little needles. This is hard ass MAN sewing with NAILS and twine that smells like old people basement.
There are probably many ways to do this. I cut a very long piece of twine, about three times the circumference of the ring. On each end I tied a nail. String it through the first hole. Bring the ends together and put half the length on each side of the hole. Sew all the way around with one length and all the way around with the other (same direction).

Photobucket

Photobucket


Step 6: The mirror
I don't have any pictures of the mirror being attached, but it wasn't anything special. Since there are holes all the way around the ring I tied the mirror to the back using more twine. I did this by making an X on the back and tying knots on the ends to keep it there. There's probably a much safer way to do this, but this worked for me.

Photobucket

Photobucket

While I was on my way home to build this, I found four shutters on the side of the road. I took them home and made a planter for a trunk (Also, destined for the landfill)

Photobucket

Photobucket

While doing this I searched the web trying to find inspiration and a purpose for these old skateboards. The only use for skateboards I could find was for handbags and ear rings, but I did find a lot of handy sites all about reusing and recycling. It's exciting to see such a large community developing that is all about DIY projects, ones that often times rely on reusing materials, thus keeping them out of landfills and reducing consumer demand. It's a beautiful thing! Make your own furniture and decor from trash! Show me! Enjoy!

Great Green Goods
How Can I recycle this?
Green your...
Ecolect Blog: skatewear
And last but not least, Instructables.

As for acquiring material,
Freecycle (free stuff)
Kijiji (Cheap stuff)
Craigslist (more cheap stuff)
Dumpster (One man's trash...)

7.25.2008

I want to ride my bicycle, I want to ride my bike

This blog was assembled from a stockpile of free time, sewn together with threads of nothing better to do, and shellacked with a few coats of sought approval from anonymous internet personalities. I suspect it will be equal parts internet-based portfolio as well as a forum for all the delightful things that pop into my head and/or onto my screen. This week the topic is bicycles!

What did Freddie Mercury want to ride? I'll give you a hint: It's hard, strong, and gets around... That's right, he wants to ride his bicycle, he wants to ride his bike. I couldn't agree more with the Queen frontman's desire to hop on a finely tuned, two wheeled piece of machinery. Up until recently I've been riding cheap, pre-owned mountain bikes from local shops. That was until a trip to the grocery store with my roommate. He was riding a single gear Trek Soho S and I couldn't keep up! I hadn't realized the benifit of those narrow wheels and lightweight frame. A few days later I went to the bike shop and had them assemble my own Soho 1.0 and took it for a test ride. What a beautiful machine! I immediately felt my stomach sink when those 900 precious dollars left my bank account, but it was well worth it, even after flying over the handle bars at an intersection just a week after the purchase.


(
sprained wrist from intersection incident)

My love for this mass of rubber and aluminum stems from many interests. I think the two most inportant reasons to ride a bike are to stay in shape and to support sustainable transportation. There's no greater feeling than passing a line of automobiles stuck in traffic, knowing that you're going to be home before them, and instead of burning petrol your burning fat. I don't know if I'd call myself a "Cyclist". I don't parade around in a spandex onesie and ride across the country, but it is my main form of transportation and I think Halagonians need to consider a bicycle to be just that: a mode of transportation. Bikes are not just for Lance Armstrong and the weekend adventurer. Far too often do people hop in their car to travel to a friends house or to pick up their favorite Queen album at the record store. Ride a bike! Get in Shape! Reduce your emissions! Have fun!

7.24.2008

Maiden post

Hello blog viewing community. Today I wont be sharing any wisdom. don't worry though, you'll soon experience the wisest shit on the internet. I've yet to decide how my blog will be arranged, but hopefully tomorrow night I'll put on the old HTML editing cap and get to work. Then y'all can bask in its aesthetic glory. Until then you'll just have to do your basking some place else.