
This weekend I made two pieces of decor that only cost me a roll of heavy duty twine, and here's how!
When I left Good ol' O'Brien hall in April I found six skateboard decks in the garbage. They weren't broken, but heavily used. I figured there's got to be something that you can make with skateboards, so they sat in my father's basement for several months...
The other day when I was coming home (on garbage day) I found a mirror on the side of the road. After that I did what anybody with six skateboards and a mirror would do: Said, "Shit, son, I've got too much garbage in my house." Then Put them in my closet for later use.
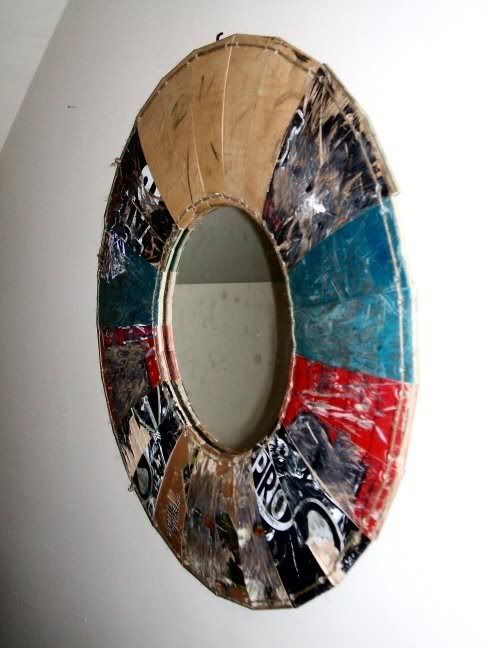
I tried to put up my mirror, but not only did it look ridiculous, it didn't have any way to fasten to the wall. I needed a frame so that I could hang it somewh- A FRAME I'LL MAKE A FRAME! But not just any frame, a ROUND frame made of SKATEBOARDS.
Step 1: Design
The first problem was how to make the largest ring possible with the materials that I had. An optimization problem, essentially. To solve it I made a set of formulas that would calculate the length of each side of the trapezoids that make up the ring relative to the number of pieces being used and the radius of the ring. If trigonometry isn't your bag, you can download a spreadsheet here to work it out.
For those that want to know, the equations used are below
a=sin(Θ/2)*2r
x=tan(Θ/2)*8
b=a-2x
Where Θ is 360/number of pieces
I had to play around with the numbers a bit to find a size that didn't require me to cut at an angle of 13.15982 or something equally impossible. You have to keep in mind that you can only cut about 12 inches of the middle of the skateboard (within the wheelbase), after that the contour changes and pieces wont fit together uniformly when you put them together. You'll also run into the holes for the trucks.
Step 2: Cut!
Pretty simple. Just make your cuts. if you don't have an electric mitre saw you can use a mitre box and hand saw. Or if you have a lot of patience, draw a line and cut with a hand saw. Or, if you're Chuck Norris, use precision round house kicks.
On the topic of precision, mitre saws are not. If I had to guess they're probably accurate to within +- 1 or 2 degrees. If you're cutting a lot of pieces at small angles (like I was) your wedges are not going to be identical. This means that at the end you will have to compensate, probably by adding an extra piece, which is what I did. If you have some extra wood you could make practice cuts and find where on the saw the right angle is.
Step 3: Glue
Glue that shit together.
Step 4: Drill
Once the glue has dried you should be able to handle it. WITH CARE. Wood glue is strong, but it is by no means ready for a game of skateboard ring Frisbee. Put it on top of some scrap wood or on a floor that is impermeable to drills...Drill four holes in each piece. One at each corner. You could measure these, but I didn't want to mark 100 holes so I just eyeballed it.
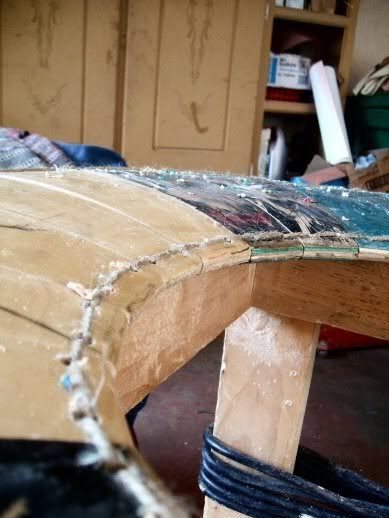
Step 5: Sew
This isn't your grandmother's sewing with little needles. This is hard ass MAN sewing with NAILS and twine that smells like old people basement.
There are probably many ways to do this. I cut a very long piece of twine, about three times the circumference of the ring. On each end I tied a nail. String it through the first hole. Bring the ends together and put half the length on each side of the hole. Sew all the way around with one length and all the way around with the other (same direction).
Step 6: The mirror
I don't have any pictures of the mirror being attached, but it wasn't anything special. Since there are holes all the way around the ring I tied the mirror to the back using more twine. I did this by making an X on the back and tying knots on the ends to keep it there. There's probably a much safer way to do this, but this worked for me.
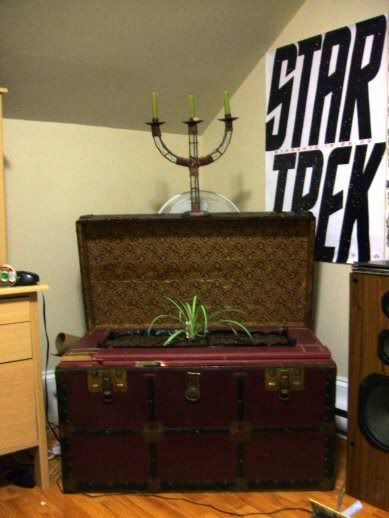
While I was on my way home to build this, I found four shutters on the side of the road. I took them home and made a planter for a trunk (Also, destined for the landfill)

While doing this I searched the web trying to find inspiration and a purpose for these old skateboards. The only use for skateboards I could find was for handbags and ear rings, but I did find a lot of handy sites all about reusing and recycling. It's exciting to see such a large community developing that is all about DIY projects, ones that often times rely on reusing materials, thus keeping them out of landfills and reducing consumer demand. It's a beautiful thing! Make your own furniture and decor from trash! Show me! Enjoy!
Great Green Goods
How Can I recycle this?
Green your...
Ecolect Blog: skatewear
And last but not least, Instructables.
As for acquiring material,
Freecycle (free stuff)
Kijiji (Cheap stuff)
Craigslist (more cheap stuff)
Dumpster (One man's trash...)
No comments:
Post a Comment